MPC 1000 Tutorial: Mastering Workflow with Custom Pad Assignments
Introduction to the MPC 1000 tutorial
The Akai MPC 1000 is a legendary tool for music producers, beatmakers, and creative minds who demand both flexibility and precision. At the heart of its power lies the ability to customize pad assignments—a feature that, when mastered, can transform your workflow, speed up your creative process, and help you achieve a signature sound. This comprehensive mpc 1000 tutorial will guide you through every aspect of custom pad assignments, from foundational concepts to advanced techniques, all while channeling the analytical, strategic, and supportive tone of the MPC 1000 Sounds brand voice. Whether you’re a meticulous architect of sound or a spontaneous creator, this guide is designed to appeal to all 16 personality types, ensuring every reader finds actionable value.
Table of Contents
- Why Custom Pad Assignments Matter
- Understanding the MPC 1000 Pad Architecture
- Setting Up Your Workspace for Success
- Step-by-Step: Assigning Sounds to Pads
- Advanced Pad Assignment Techniques
- Optimizing for Live Performance
- Workflow Templates and Genre-Specific Setups
- Troubleshooting and FAQs
- Integrating with Other Gear and Software
- Community Tips and Real-World Examples
- Conclusion and Next Steps
1. Why Custom Pad Assignments Matter in Your mpc 1000 tutorial
Custom pad assignments are more than a convenience—they are the backbone of a personalized workflow. By strategically placing your most-used sounds, samples, and functions at your fingertips, you:
- Reduce creative friction
- Speed up beat construction
- Enable spontaneous performance
- Develop muscle memory for complex routines
- Create a unique, signature setup that reflects your style
For the architect personality, this is about building a system that maximizes efficiency and creative potential. For other types, it’s about making the MPC 1000 feel like an extension of your musical intuition.
2. Understanding the MPC 1000 Pad Architecture: A Core of Every mpc 1000 tutorial
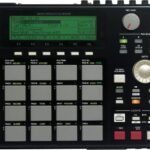
The MPC 1000 features 16 velocity- and pressure-sensitive pads, organized in a 4×4 grid. Each pad can be assigned any sample, sound, or MIDI note. With four pad banks (A, B, C, D), you have access to 64 unique pad slots per program.
Key Concepts for the mpc 1000 tutorial:
- Pad Banks: Switch between banks to access more sounds without changing programs.
- Pad Layers: Assign multiple samples to a single pad for complex, layered sounds.
- Velocity Switching: Trigger different samples based on how hard you hit the pad.
- MIDI Assignments: Use pads to send MIDI notes or control external gear.
Understanding these concepts is crucial for building a flexible and powerful setup. For more on pad architecture, check out our in-depth guide to MPC 1000 pad assignments.
3. Setting Up Your Workspace for Success
Before diving into pad assignments, set up your physical and digital workspace:
- Place your MPC 1000 at a comfortable height and angle.
- Connect monitors, headphones, and MIDI controllers as needed.
- Organize your sample library by genre, instrument, or project. See our sample organization tips.
- Back up your CompactFlash cards and keep spare cards handy.
A well-organized workspace reduces distractions and helps you focus on creativity.
4. Step-by-Step: Assigning Sounds to Pads (MPC 1000 tutorial)
Step 1: Load Your Samples
Insert your CompactFlash card and load your desired samples into memory. Use high-quality, organized samples for best results.
Step 2: Enter Program Mode
Press the [MODE] button, then pad 6 (PROGRAM) to access the program mode where you can assign samples to pads.
Step 3: Assign Samples
- Select a pad using the 4×4 grid.
- Use the data wheel to scroll through available samples.
- Assign the chosen sample to the selected pad.
- Repeat for all pads you wish to customize.
Step 4: Save Your Program
Once your assignments are complete, save the program to your CompactFlash card. Name your program clearly (e.g., “BoomBapKit_Apr25”) for easy recall.
Step 5: Test and Refine
Play each pad to ensure the assignments feel intuitive. Adjust as needed for comfort and workflow. For more step-by-step help, visit our MPC 1000 tutorial knowledgebase.
5. Advanced Pad Assignment Techniques in the mpc 1000 tutorial
Layering Samples
Assign up to four samples to a single pad. Use this for:
- Creating thick, layered drum hits
- Blending acoustic and electronic textures
- Adding subtle variations with velocity switching
Velocity Switching
Set velocity ranges so that soft hits trigger one sample, while hard hits trigger another. This adds dynamic expression to your playing.
Choke Groups
Assign pads to choke groups so that triggering one pad mutes another (useful for hi-hats and open/closed sounds).
Pad Copy and Swap
Quickly copy assignments from one pad to another or swap pads to experiment with different layouts.
Custom Pad Banks for Genres
Create dedicated pad banks for different genres (e.g., Bank A for hip hop drums, Bank B for synth stabs, Bank C for vocal chops). For downloadable templates, see our Workflow Templates section.
6. Optimizing for Live Performance with the mpc 1000 tutorial
Custom pad assignments are invaluable for live sets:
- Place your most-used sounds on Bank A for instant access.
- Use pad banks to switch between song sections or instrument groups.
- Assign effects or MIDI controls to pads for real-time manipulation.
- Practice your set to develop muscle memory and confidence.
For performers, a well-designed pad layout can mean the difference between a smooth set and a stressful one. For more live performance tips, check out the MPC-Forums Live Performance section.
7. Workflow Templates and Genre-Specific Setups for the mpc 1000 tutorial
Hip Hop Template
- Pads 1–4: Kicks
- Pads 5–8: Snares/Claps
- Pads 9–12: Hi-hats
- Pads 13–16: Percussion/FX
Electronic/EDM Template
- Pads 1–4: Synth stabs
- Pads 5–8: Drum hits
- Pads 9–12: Vocal chops
- Pads 13–16: FX/risers
Live Looping Template
- Pads 1–8: Loops (drums, bass, melody)
- Pads 9–16: One-shots and fills
Save these templates as starting points for new projects. For more templates, visit our MPC 1000 Templates Library.
8. Troubleshooting and FAQs for the mpc 1000 tutorial
Q: My pads aren’t triggering the right sounds. What should I check?
A: Double-check your program assignments and ensure you’ve loaded the correct program.
Q: Can I back up my pad assignments?
A: Yes, always save your programs to CompactFlash and keep backup copies on your computer.
Q: How do I fix pad sensitivity issues?
A: Calibrate pad sensitivity in the settings menu, or refer to our troubleshooting guide for hardware fixes.
Q: Can I use custom pad assignments with external MIDI gear?
A: Absolutely! Assign pads to send MIDI notes or CC messages to control synths, drum machines, or DAWs.
9. Integrating with Other Gear and Software
The MPC 1000 shines in hybrid setups:
- Use MIDI out to trigger external synths or drum machines.
- Sync your MPC 1000 with DAWs for expanded sequencing.
- Assign pads to control software instruments or effects via MIDI mapping.
- Combine hardware and software workflows for maximum flexibility.
For more on integration, see Akai’s official integration guide.
10. Community Tips and Real-World Examples from the mpc 1000 tutorial
Producer Spotlights
- Architect (INTJ): Designs intricate pad layouts for multi-genre sets, using velocity switching for expressive performance.
- Campaigner (ENFP): Prefers spontaneous, ever-changing pad assignments, focusing on live improvisation.
- Logistician (ISTJ): Uses strict templates and backups for every project, ensuring consistency and reliability.
- Mediator (INFP): Collaborates with others, sharing pad layouts and workflow tips in online communities.
Community Wisdom
- “Save your favorite pad layouts as templates—you’ll thank yourself later.”
- “Experiment with layering and velocity switching to add depth to your beats.”
- “Join forums and share your setups; you’ll learn new tricks and inspire others.” Visit MPC-Forums.com for more community tips.
11. Conclusion and Next Steps
Mastering custom pad assignments on the MPC 1000 is a journey of discovery and refinement. By investing time in building a personalized workflow, you unlock new levels of creativity, efficiency, and performance. Whether you’re producing in the studio or performing on stage, your MPC 1000 can become a true extension of your musical vision.
Next Steps:
- Review your current pad assignments and identify areas for improvement.
- Create and save genre-specific templates for future projects.
- Explore advanced features like velocity switching and MIDI integration.
- Connect with the MPC 1000 Sounds community for support and inspiration.
Start Creating with custom pad setups and elevate your beat-making process! For more in-depth tutorials and community support, visit the MPC 1000 Sounds Knowledgebase and join our growing network of producers.